PAX 75×35×201Cabinet used
12 mmBirch plywood
~1 dayBuild time
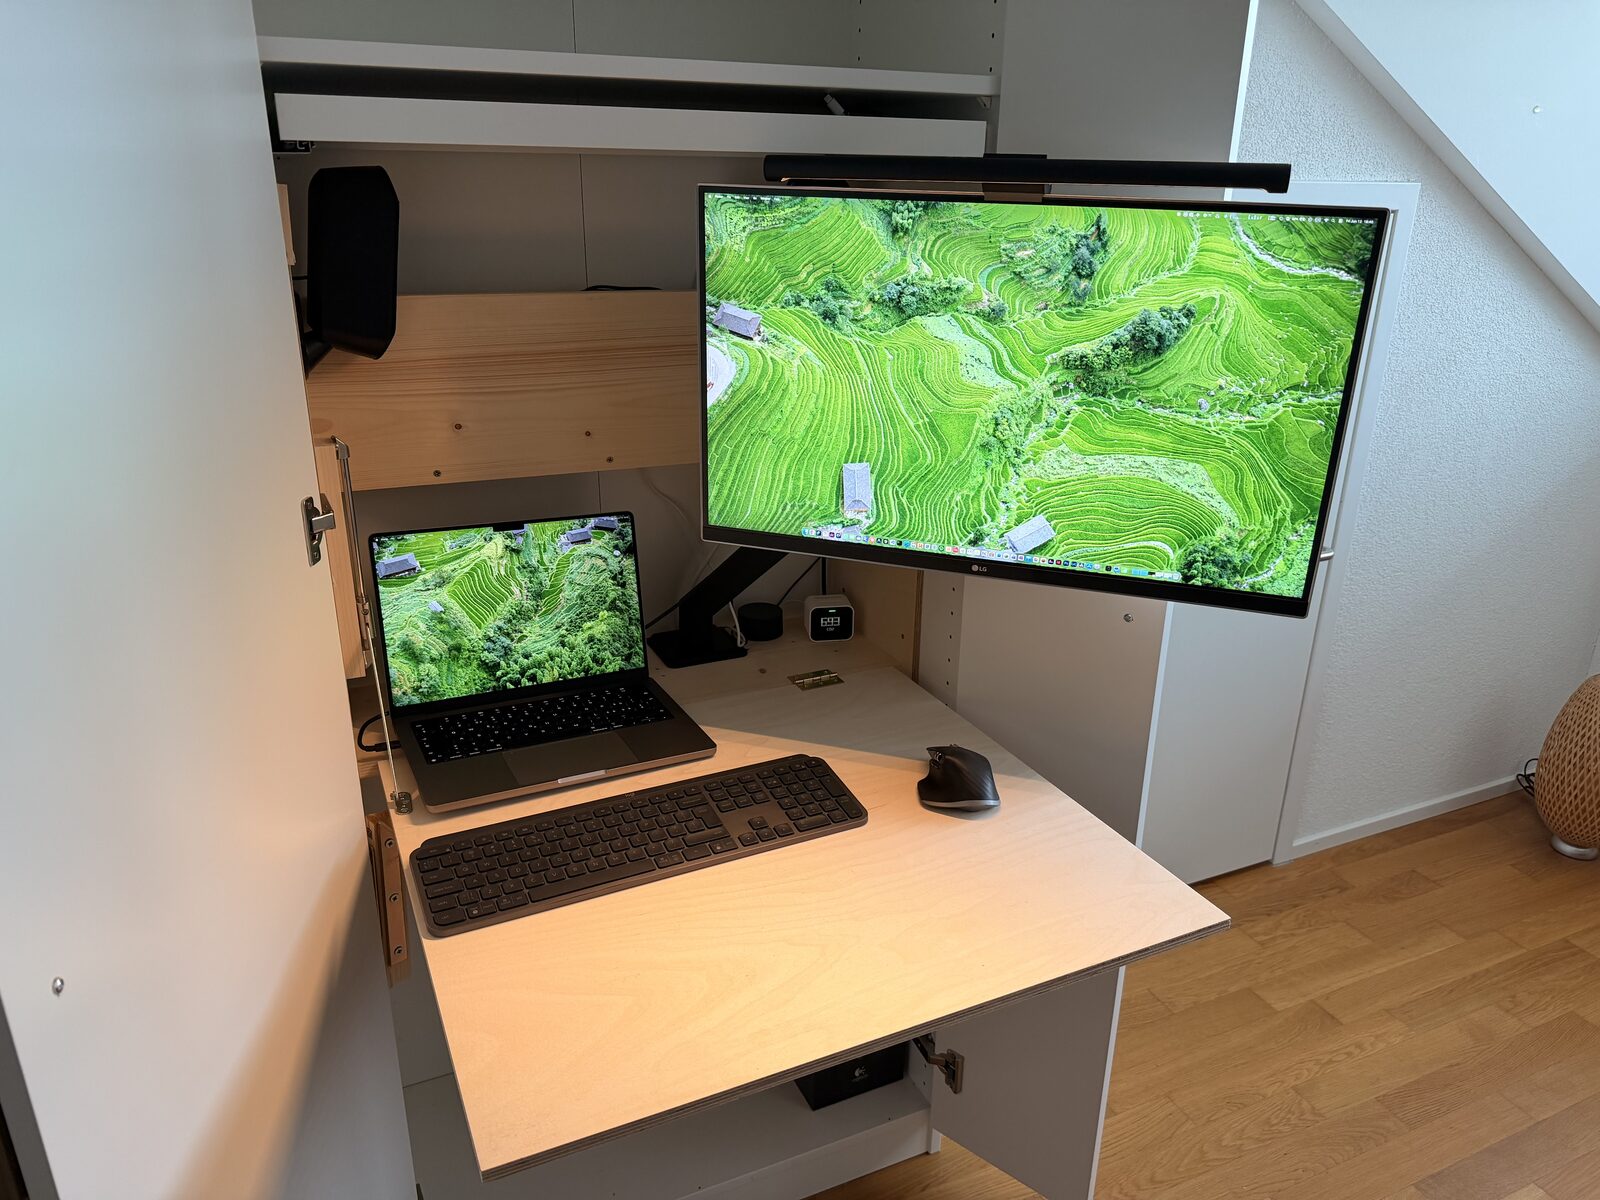
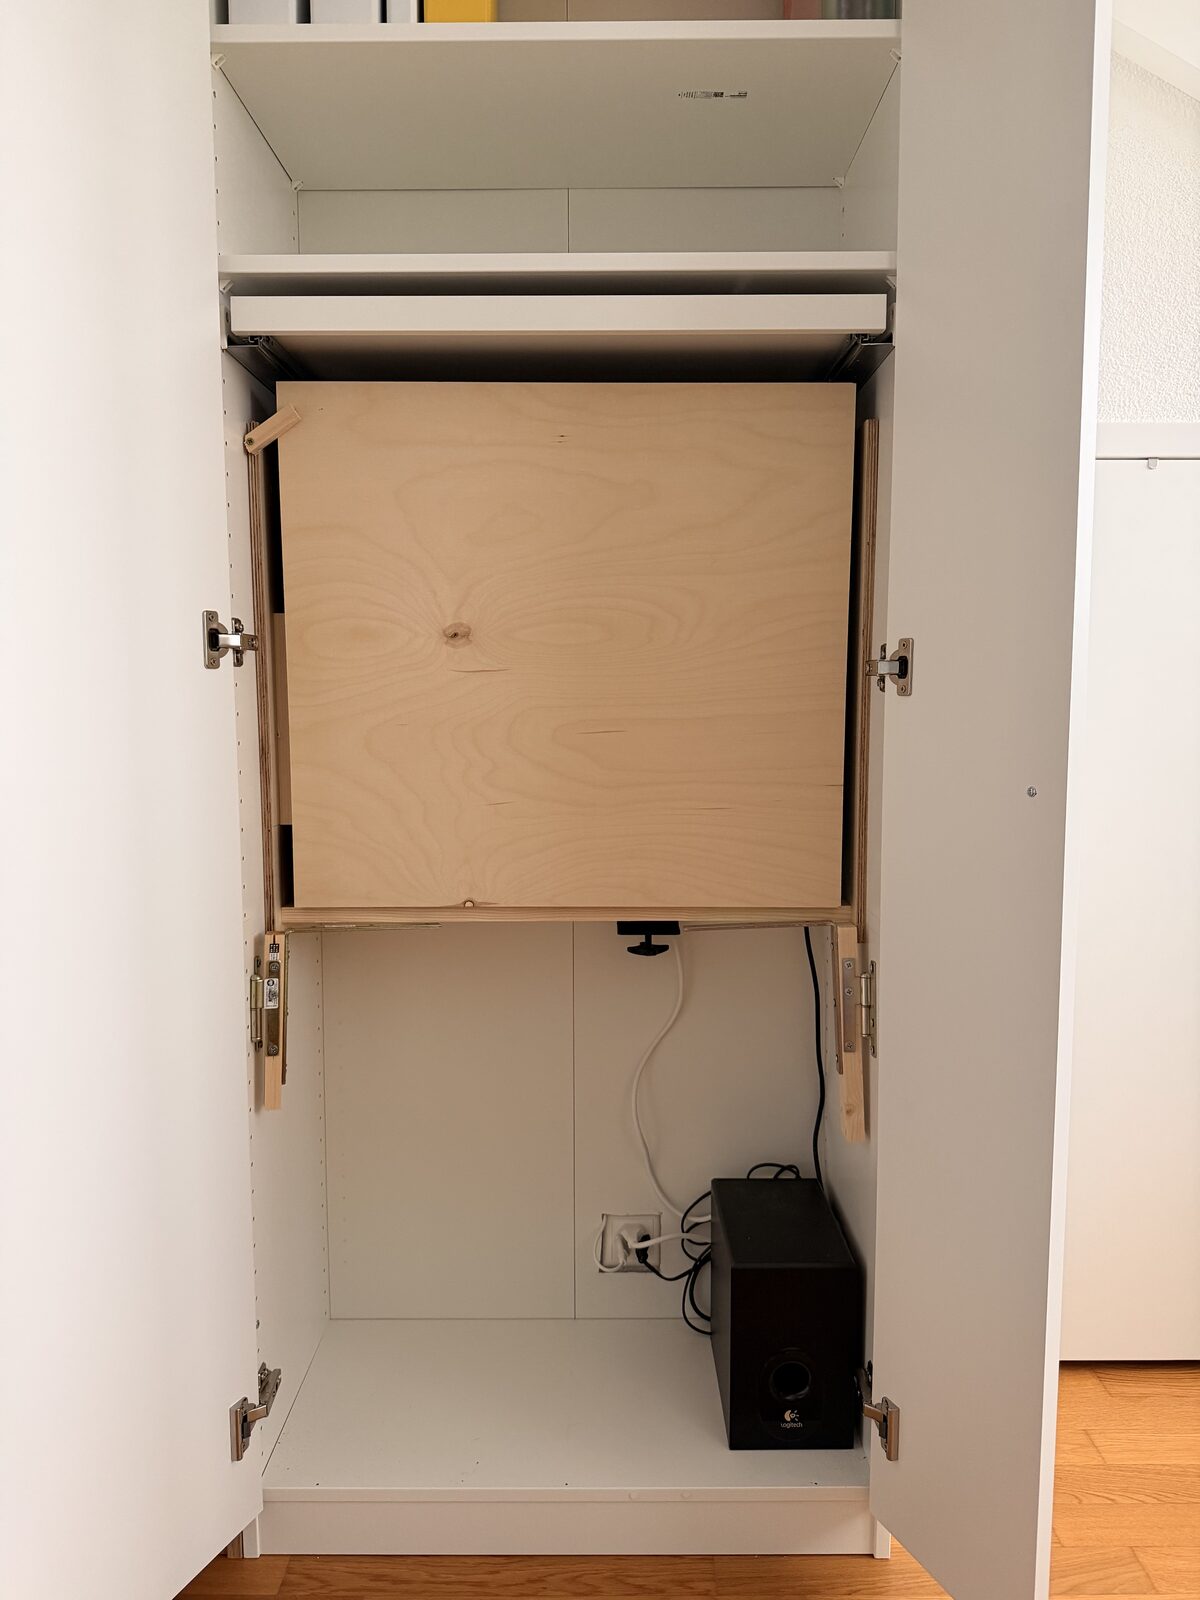
The desk lives inside the upper half of a shallow IKEA PAX frame. The plywood work surface is hinged at the front edge: fold it down and a monitor, keyboard and laptop dock appear; fold it up and the cabinet looks like any other wardrobe.
Two standard PAX doors close over everything. No visible desk, no clutter — ideal for a bedroom, guest room or open-plan flat.
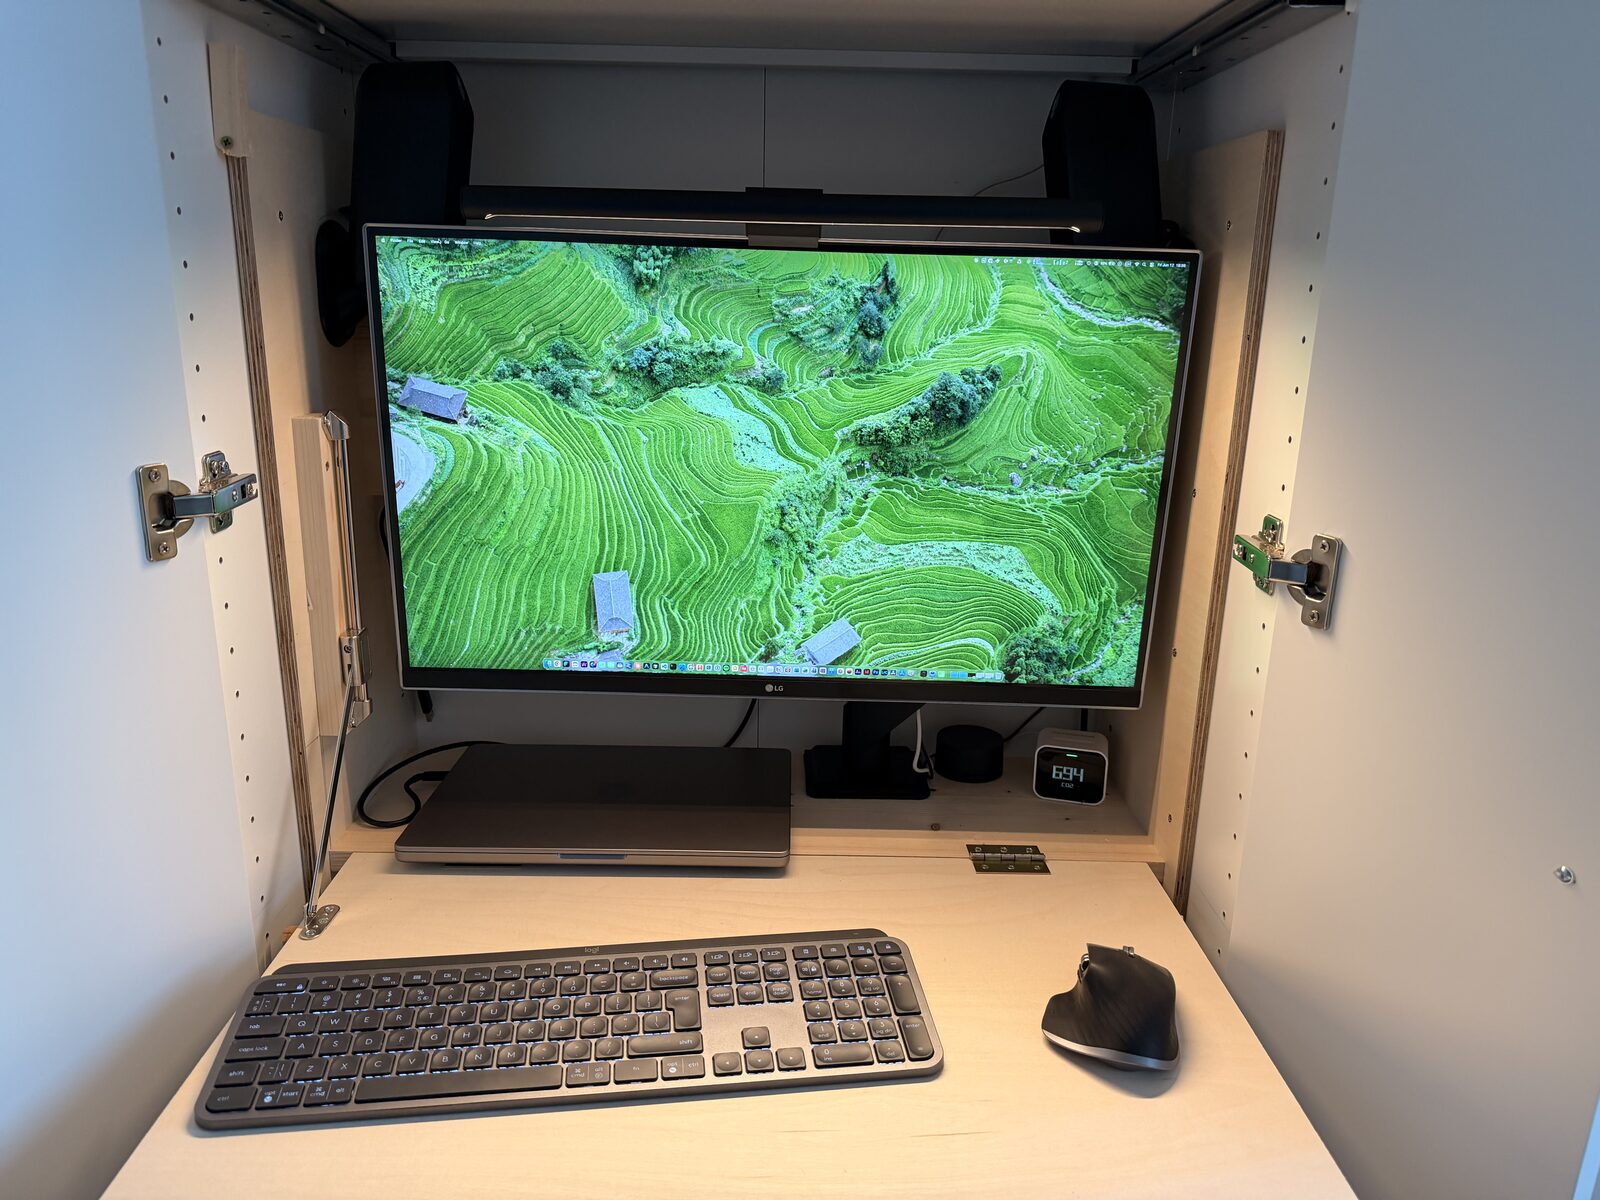
A VESA monitor arm (ARCTIC X1-3D) holds a full-size screen at eye height, with a roomy plywood surface for a keyboard, mouse and laptop.
A power strip and all cabling are mounted within the cabinet, so nothing trails out when the desk is closed.
Tap any photo to enlarge. These show the desk open and in use, plus the hinge, bracket and gas-strut details that make it work.
Everything needed beyond the IKEA PAX frame itself, with exact cut sizes grouped by board thickness. Quantities and dimensions are from the original build for a PAX 75×35×201 cm frame.
| Part | Piece | Cut size (L × W) | Qty |
|---|---|---|---|
| A | Fold-down desk top | 65 × 60 cm | 1 |
| C | Box side panel | 60 × 25 cm | 2 |
| Part | Piece | Cut size (L × W) | Qty |
|---|---|---|---|
| B | Bottom shelf & upright backing panel | 68.6 × 25 cm | 2 |
| D | Mounting block — gas-strut lid stay & angle brackets | 25 × 5 cm | 3 |
| E | Power-strip shelf (L-foot of upright B) | 68.6 × 5 cm | 1 |
| Item | Spec | Qty |
|---|---|---|
| IKEA PAX frame | 75 × 35 × 201 cm, with two doors | 1 |
| Hinges | For the fold-down desk plate | 2 |
| Angle brackets (Winkel) | Brass L-brackets, desk-top support (on swing-out blocks) | 2 |
| Door hinges | Mount the bracket blocks to the PAX wall so they swing out / back | 2 |
| Gas-strut lid stay | Soft-open / hold-open strut | 1 |
| Monitor arm | ARCTIC X1-3D VESA gas-spring arm | 1 |
| Monitor light bar | Xiaomi Light Bar (screen bar) | 1 |
| Power strip | Multi-socket, mounted inside the cabinet | 1 |
| Screws | Wood screws (hinge hole spacing ≈ 1.7 cm) | set |
Tools: drill/driver, circular saw or jigsaw, tape measure, pencil, screwdriver, and a sander for the plywood edges.
Each piece below is taken from the original pencil plans. All boards are 12 mm birch plywood unless noted; the mounting blocks are 2 cm thick wood.
The five cut parts make an open box with a hinged front. These diagrams — redrawn from the original plan — show the layout from the front and in cross-section.
Six stages, from the bare IKEA frame to a working hidden desk. Photos show the real hinge, bracket and cable details.
Build the IKEA PAX 75×35×201 cm frame and hang both doors following IKEA's own instructions. The usable inner opening is about 71 cm wide — every dimension is sized to that.
Cut the two B panels (68.6 × 25 cm, 2 cm solid wood) — one is the bottom shelf, the other stands upright in the monitor's plane — the two C side panels (60 × 25 cm, 12 mm ply), and the E foot. Screw them into one box: the upright B and E form a mirror-L that stiffens the box and hides the cables. See the assembly diagram above.
Screw the ARCTIC X1-3D VESA arm's base to the bottom B shelf now, while the box is still on the bench and you have full access. Doing this after the box is in the cabinet is far harder.
Slide the box into the upper section so the bottom B shelf sits at desk height, then fix it to the cabinet with 8 screws on each side for a rock-solid mount.
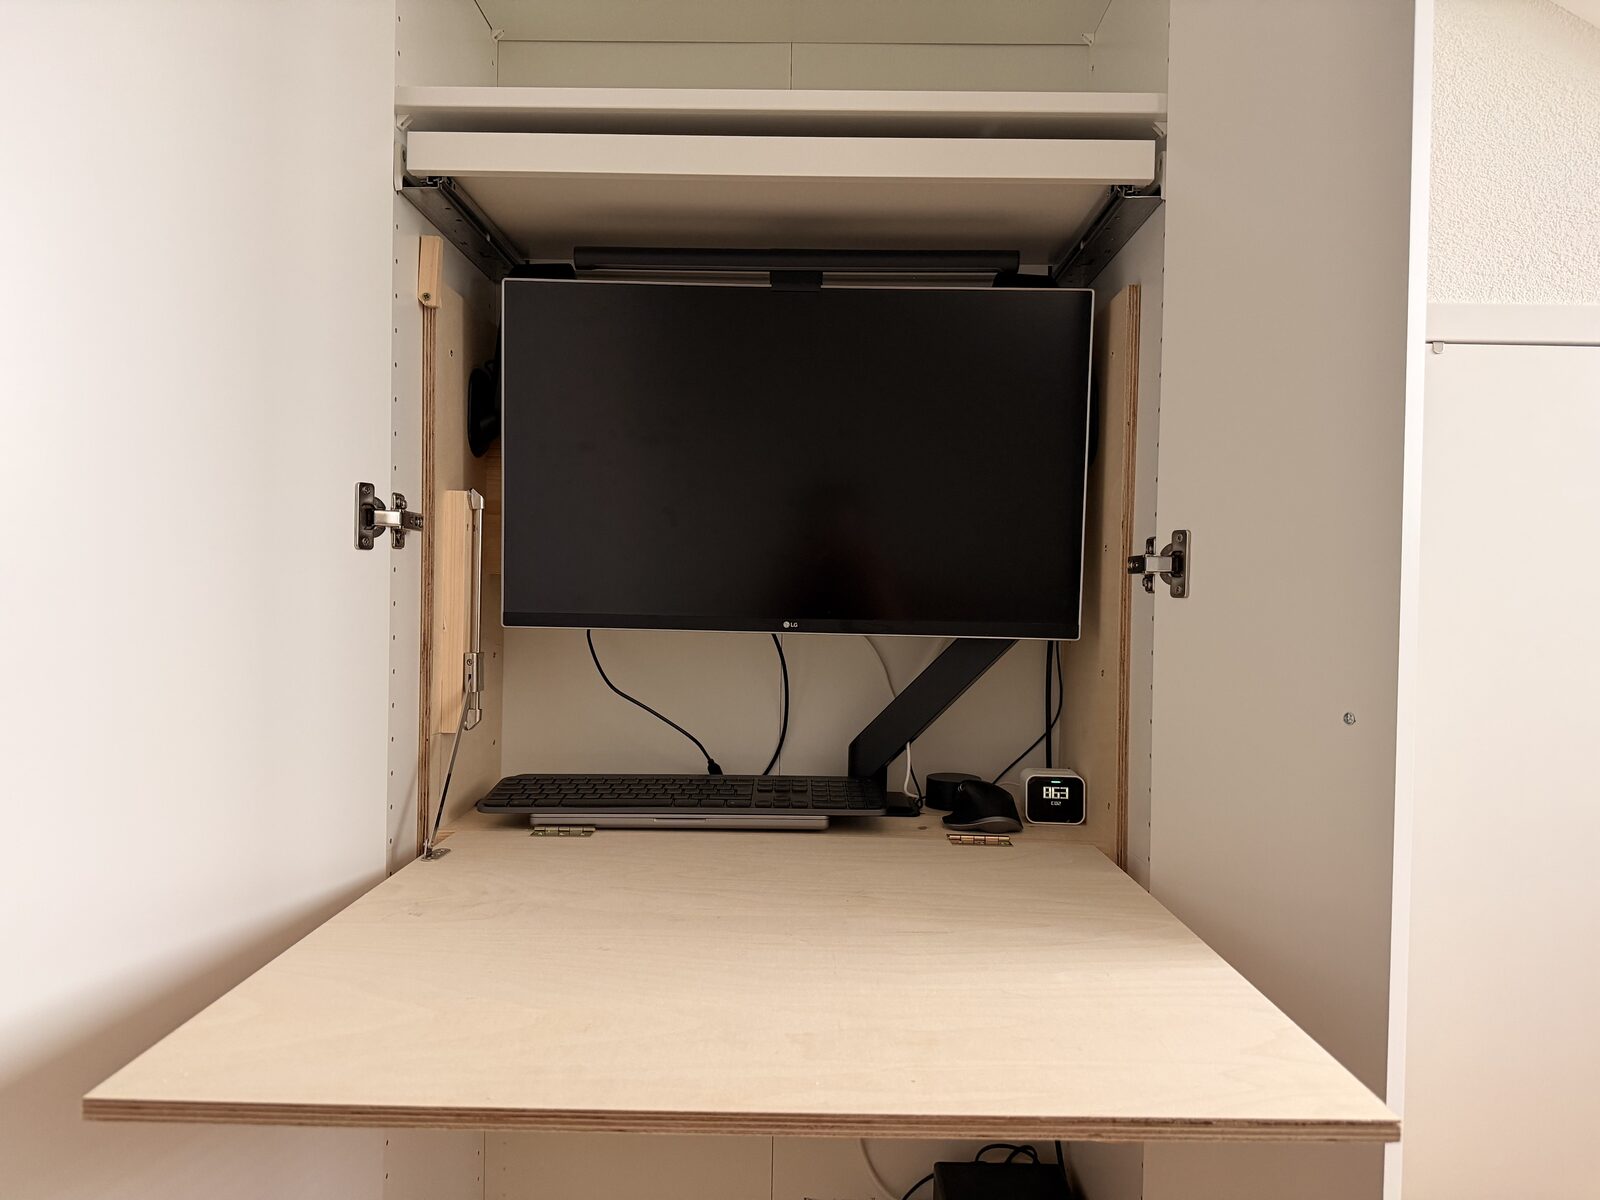
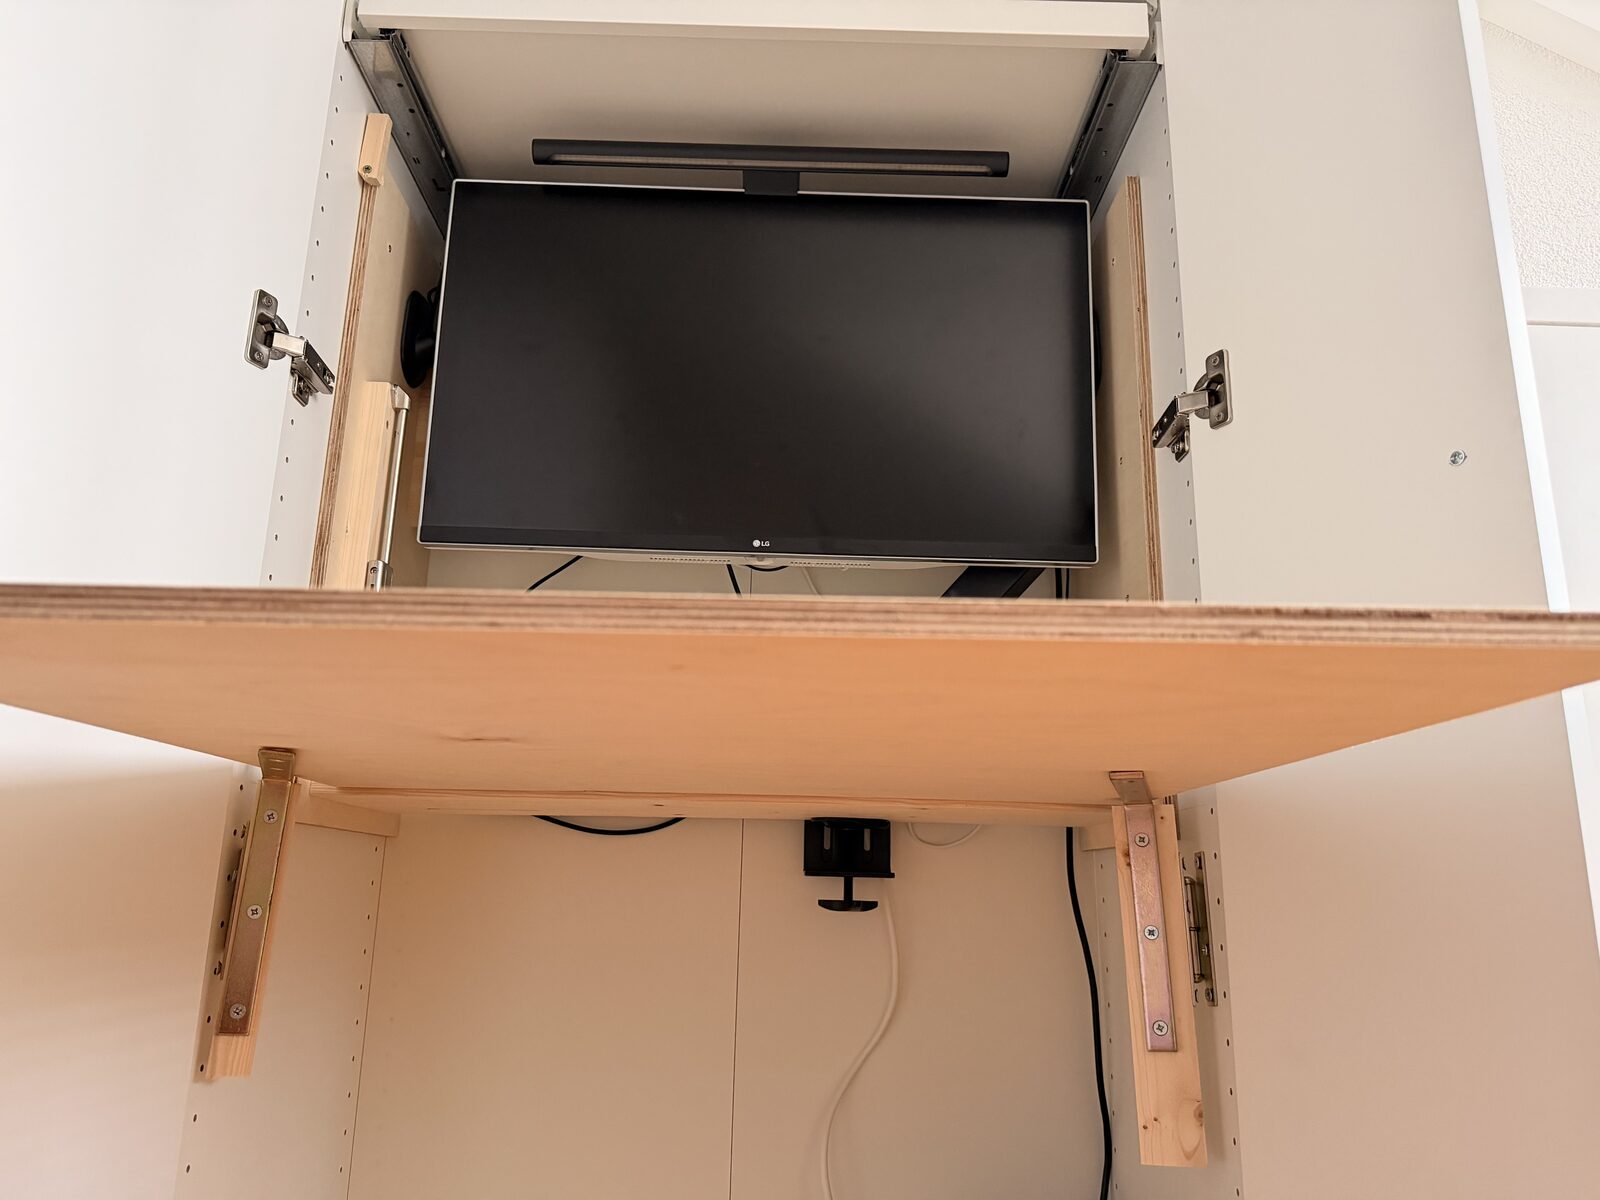
Screw the three D blocks (2 cm thick) to the inner faces — two for the angle brackets, one for the gas strut — then hinge desk top A (65 × 60 cm) along its bottom edge with the two hinges so it swings from vertical (hidden) to horizontal (working).
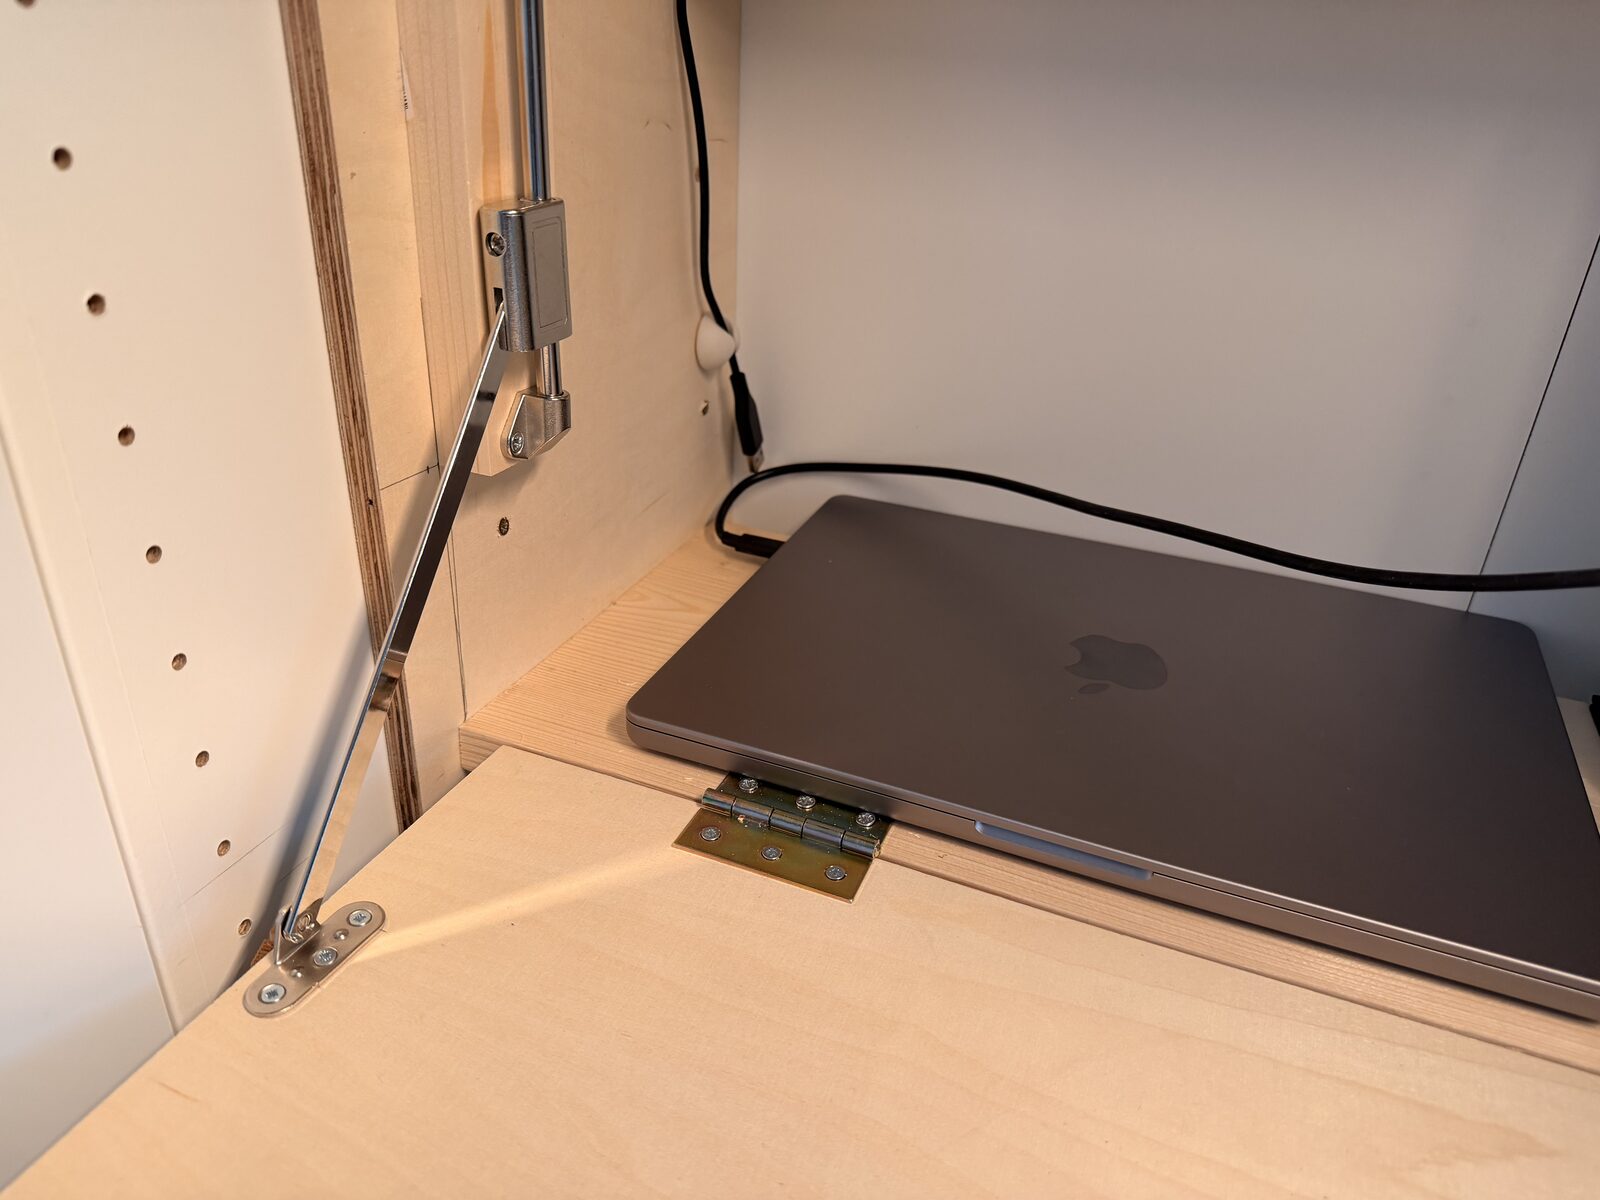
Fit the two brass angle brackets onto their D blocks, and fit the single gas-strut lid stay. The clever bit: each bracket block hangs on a small door hinge fixed to the PAX side wall, so it swings out to catch the open desk — the top drops level onto the brackets and is held rock-steady. When you want to close up, swing the brackets back in so the PAX doors shut normally.
Hang the monitor on the arm and clip a Xiaomi Light Bar on top for glare-free light. Sit the power strip on the E foot behind the upright B and route every cable there, so nothing shows when the doors close.
This build uses a PAX frame measuring 75 × 35 × 201 cm with two doors. The shallow 35 cm depth is deliberate — the fold-down top extends out past the cabinet front when open, giving a full-depth work surface from a slim wardrobe.
12 mm birch plywood for the fold-down desk top and the box side panels; the bottom shelf and the upright backing panel are 2 cm solid wood for extra strength where the hardware bolts on. Birch is light enough to fold easily but stiff enough not to sag at 65 × 60 cm.
On an ARCTIC X1-3D VESA gas-spring arm bolted to the inner plywood box. Because the arm carries the screen, the fold-down top stays completely clear for a keyboard, mouse and laptop.
Two brass angle brackets stop the top at exactly horizontal and a gas-strut lid stay takes the weight. The brackets sit on small door hinges fixed to the PAX wall, so they swing out to support the open desk and swing back in afterwards so the cabinet doors can close normally.
Yes. The only dimensions that must change are the ones tied to the inner width (the 68.6 cm shelves and backing strip, and the 65 cm top). Measure your frame's real opening and scale those parts; the hardware stays the same.
Roughly a day of work for someone comfortable with basic power tools, plus the time to assemble the PAX itself. Most of the effort is careful measuring and fitting the hinges so the top closes flush.